You've set up your scraper, configured your proxy, and everything works—until it doesn't.
The site detects your automation. Your IP gets flagged. Your accounts get banned.
This happens because standard browsers leave fingerprints that anti-bot systems recognize instantly.
BitBrowser combined with proper proxy rotation solves this problem by creating isolated browser environments with unique fingerprints.
In this guide, you'll learn how to automate web scraping at scale using BitBrowser's Local API with Playwright, Puppeteer, or Selenium—all routing through rotating proxies.
What is BitBrowser and Why Use It for Scraping?
BitBrowser is an anti-detect browser that creates isolated browser profiles, each with unique fingerprints and proxy configurations.
Unlike standard browsers, BitBrowser manipulates browser fingerprints at the kernel level.
This means each profile appears as a completely different device to websites.
Here's what makes it powerful for scraping:
- Isolated browser profiles with independent cookies, storage, and fingerprints
- Built-in proxy support for HTTP, HTTPS, SOCKS5, and SSH protocols
- Local API for programmatic control via Playwright, Puppeteer, or Selenium
- RPA automation for complex workflows without writing code
- Team collaboration features for managing profiles across multiple users
The key advantage over regular headless browsers: websites cannot correlate your scraping sessions.
Each profile looks like a different user on a different machine.
Prerequisites
Before starting, ensure you have:
- BitBrowser installed and logged in (download from bitbrowser.net)
- Python 3.8+ or Node.js 16+ installed
- Residential or datacenter proxies (you'll need credentials)
- Basic familiarity with web scraping concepts
Step 1: Configure BitBrowser's Local API
First, enable the Local API in BitBrowser settings.
Open BitBrowser and navigate to Settings.
Find the Local API section.
Note the URL and port (default is http://127.0.0.1:54345).
This endpoint lets you programmatically create, open, and control browser profiles.
Default API endpoint: http://127.0.0.1:54345
Test the connection by opening this URL in your browser.
You should see a response confirming the API is running.
Step 2: Create a Browser Profile with Proxy Configuration
Before automating, you need a profile configured with your proxy.
You can create profiles manually through BitBrowser's UI or programmatically via the API.
Manual Profile Creation
- Click Browser Profiles in the left sidebar
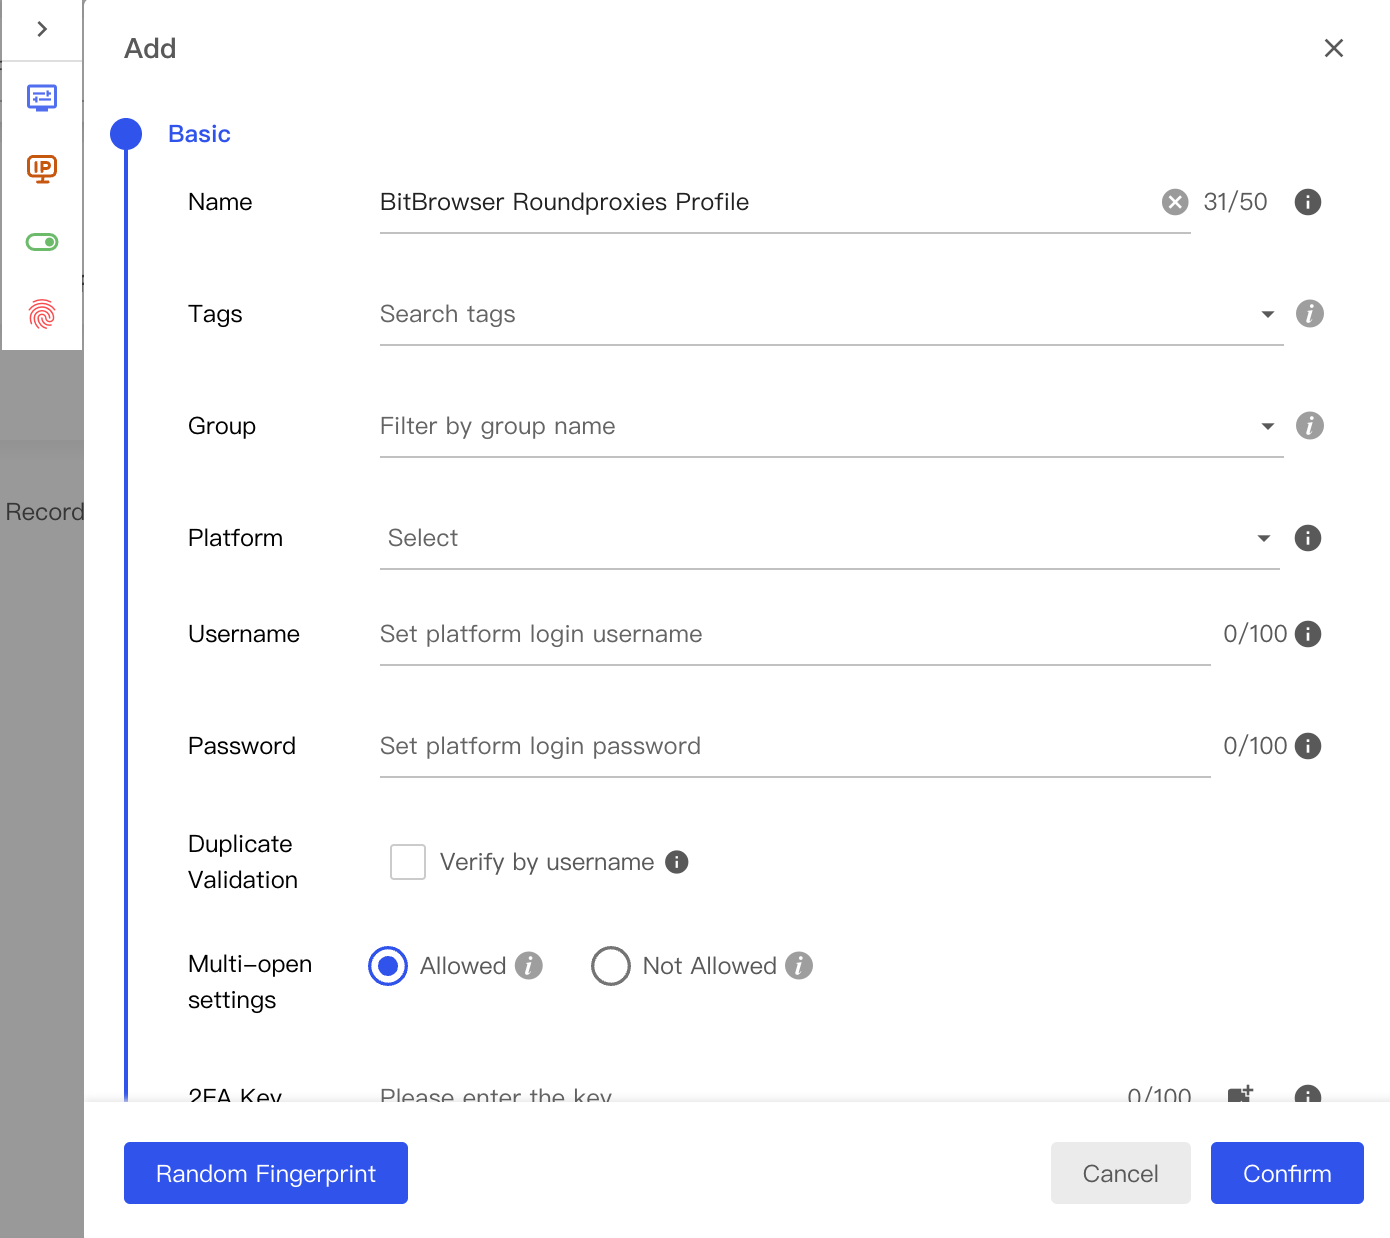
- Click + Add to create a new profile
- In the Basic section, name your profile (e.g., "scraper-profile-1")
- Scroll to the Proxy section
- Select your proxy type: HTTP, HTTPS, or SOCKS5
Enter your proxy details:
Proxy Type: HTTP (or SOCKS5)
Host: residential.roundproxies.com
Port: 5000
Username: your_username
Password: your_password
Click Check Proxy to verify the connection.
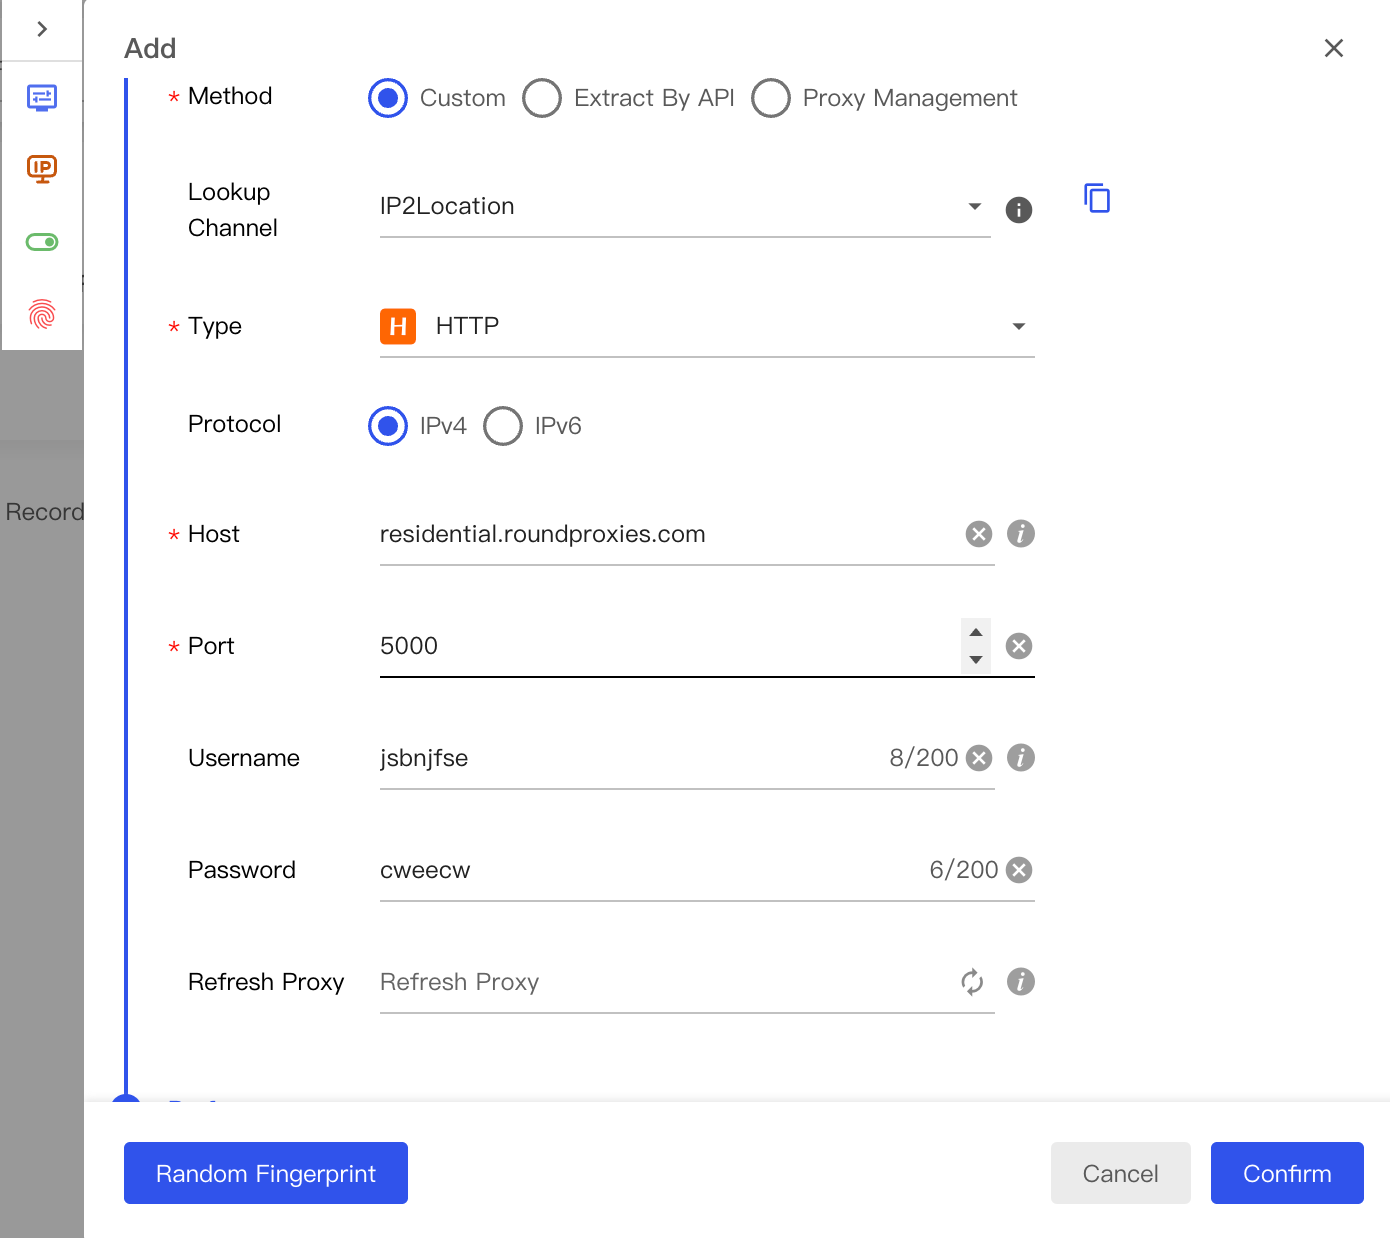
If successful, click Confirm to save.
Programmatic Profile Creation (Python)
Creating profiles via API gives you control at scale.
import requests
import json

API_BASE = "http://127.0.0.1:54345"

def create_profile(name, proxy_config):
    """Create a new browser profile with proxy settings."""

    endpoint = f"{API_BASE}/browser/update"

    payload = {
        "name": name,
        "remark": "Scraping profile",
        "proxyMethod": 2,  # Custom proxy
        "proxyType": proxy_config["type"],
        "host": proxy_config["host"],
        "port": proxy_config["port"],
        "proxyUserName": proxy_config["username"],
        "proxyPassword": proxy_config["password"]
    }

    response = requests.post(
        endpoint,
        json=payload,
        headers={"Content-Type": "application/json"}
    )

    result = response.json()

    if result.get("success"):
        return result["data"]["id"]
    else:
        raise Exception(f"Failed to create profile: {result.get('msg')}")

# Example usage
proxy = {
    "type": "http",
    "host": "residential.roundproxies.com",
    "port": 5000,
    "username": "user123",
    "password": "pass456"
}

profile_id = create_profile("scraper-001", proxy)
print(f"Created profile: {profile_id}")
This code creates a profile and returns its unique ID.
You'll use this ID to open and control the browser.
Step 3: Open the Browser Profile via API
With a profile created, you can open it programmatically.
BitBrowser returns a WebSocket endpoint for browser automation.
def open_browser(profile_id):
    """Open a browser profile and return automation endpoints."""

    endpoint = f"{API_BASE}/browser/open"

    payload = {
        "id": profile_id
    }

    response = requests.post(
        endpoint,
        json=payload,
        headers={"Content-Type": "application/json"}
    )

    result = response.json()

    if result.get("success"):
        data = result["data"]
        return {
            "ws_endpoint": data.get("ws"),
            "http_endpoint": data.get("http"),
            "driver_path": data.get("driver")
        }
    else:
        raise Exception(f"Failed to open browser: {result.get('msg')}")

# Open the profile
browser_info = open_browser(profile_id)
ws_endpoint = browser_info["ws_endpoint"]
print(f"WebSocket endpoint: {ws_endpoint}")
The WebSocket endpoint is crucial—it connects your automation code to the BitBrowser instance.
Step 4: Connect Playwright to BitBrowser
Playwright is the recommended automation library for modern web scraping.
It's faster than Selenium and handles dynamic content better than Puppeteer.
Install Playwright first:
pip install playwright
playwright install chromium
Now connect Playwright to BitBrowser using the CDP (Chrome DevTools Protocol) endpoint:
from playwright.sync_api import sync_playwright
import requests

API_BASE = "http://127.0.0.1:54345"

def scrape_with_playwright(profile_id, target_url):
    """Scrape a website using Playwright connected to BitBrowser."""

    # Step 1: Open the browser profile
    open_response = requests.post(
        f"{API_BASE}/browser/open",
        json={"id": profile_id},
        headers={"Content-Type": "application/json"}
    )

    browser_data = open_response.json()["data"]
    ws_endpoint = browser_data["ws"]

    # Step 2: Connect Playwright via CDP
    with sync_playwright() as p:
        browser = p.chromium.connect_over_cdp(ws_endpoint)

        # Get the default context and page
        context = browser.contexts[0]
        page = context.pages[0] if context.pages else context.new_page()

        # Step 3: Navigate and scrape
        page.goto(target_url, wait_until="networkidle")

        # Example: Extract all product titles
        titles = page.locator("h2.product-title").all_text_contents()

        # Example: Extract prices
        prices = page.locator("span.price").all_text_contents()

        # Combine into structured data
        products = [
            {"title": t, "price": p}
            for t, p in zip(titles, prices)
        ]

        browser.close()

    # Step 4: Close the BitBrowser profile
    requests.post(
        f"{API_BASE}/browser/close",
        json={"id": profile_id},
        headers={"Content-Type": "application/json"}
    )

    return products

# Run the scraper
results = scrape_with_playwright(profile_id, "https://example-shop.com")
print(f"Found {len(results)} products")
This script opens a BitBrowser profile, connects Playwright, scrapes product data, and closes everything cleanly.
The key function is connect_over_cdp()—it attaches Playwright to the running BitBrowser instance.
Step 5: Implement Proxy Rotation
Static proxies get flagged quickly.
Rotating proxies across requests dramatically improves success rates.
Here's a rotation strategy using multiple BitBrowser profiles:
import random
import time

class ProxyRotator:
    """Manage multiple profiles for proxy rotation."""

    def __init__(self, api_base, proxies):
        self.api_base = api_base
        self.profiles = []
        self.current_index = 0

        # Create a profile for each proxy
        for i, proxy in enumerate(proxies):
            profile_id = create_profile(f"rotator-{i}", proxy)
            self.profiles.append({
                "id": profile_id,
                "proxy": proxy,
                "requests": 0
            })

    def get_next_profile(self):
        """Get the next profile in rotation."""
        profile = self.profiles[self.current_index]
        self.current_index = (self.current_index + 1) % len(self.profiles)
        return profile

    def scrape_with_rotation(self, urls, max_requests_per_proxy=10):
        """Scrape multiple URLs with automatic proxy rotation."""

        all_results = []

        for url in urls:
            profile = self.get_next_profile()

            # Open browser
            browser_data = self._open_browser(profile["id"])

            try:
                # Scrape with Playwright
                with sync_playwright() as p:
                    browser = p.chromium.connect_over_cdp(browser_data["ws"])
                    context = browser.contexts[0]
                    page = context.pages[0] if context.pages else context.new_page()

                    page.goto(url, timeout=30000)

                    # Your scraping logic here
                    content = page.content()
                    all_results.append({
                        "url": url,
                        "content": content[:500],  # First 500 chars
                        "proxy_used": profile["proxy"]["host"]
                    })

                    browser.close()

            except Exception as e:
                print(f"Error scraping {url}: {e}")

            finally:
                self._close_browser(profile["id"])

            # Small delay between requests
            time.sleep(random.uniform(1, 3))

            profile["requests"] += 1

        return all_results

    def _open_browser(self, profile_id):
        response = requests.post(
            f"{self.api_base}/browser/open",
            json={"id": profile_id},
            headers={"Content-Type": "application/json"}
        )
        return response.json()["data"]

    def _close_browser(self, profile_id):
        requests.post(
            f"{self.api_base}/browser/close",
            json={"id": profile_id},
            headers={"Content-Type": "application/json"}
        )

# Example usage with multiple proxies
proxies = [
    {"type": "http", "host": "proxy1.example.com", "port": 8080,
     "username": "user1", "password": "pass1"},
    {"type": "http", "host": "proxy2.example.com", "port": 8080,
     "username": "user2", "password": "pass2"},
    {"type": "http", "host": "proxy3.example.com", "port": 8080,
     "username": "user3", "password": "pass3"},
]

rotator = ProxyRotator(API_BASE, proxies)
urls_to_scrape = ["https://example.com/page1", "https://example.com/page2"]
results = rotator.scrape_with_rotation(urls_to_scrape)
This rotator distributes requests across multiple proxy-configured profiles.
Each profile maintains its own cookies and fingerprint, making the rotation even more effective.
Step 6: Handle Anti-Bot Detection
Modern websites use multiple detection methods.
BitBrowser handles fingerprinting, but you need additional strategies.
Randomize Request Timing
Bots request pages at predictable intervals.
Add randomization to appear human:
import random
import time

def human_delay():
    """Generate a human-like delay between requests."""
    base_delay = random.uniform(2, 5)
    occasional_pause = random.random() < 0.1  # 10% chance

    if occasional_pause:
        base_delay += random.uniform(5, 15)

    time.sleep(base_delay)
Simulate Human Behavior
Moving the mouse and scrolling matters:
def simulate_human_behavior(page):
    """Add human-like interactions before scraping."""

    # Random mouse movements
    page.mouse.move(
        random.randint(100, 800),
        random.randint(100, 600)
    )

    # Scroll down gradually
    for _ in range(random.randint(2, 5)):
        page.mouse.wheel(0, random.randint(100, 300))
        time.sleep(random.uniform(0.5, 1.5))

    # Scroll back up partially
    page.mouse.wheel(0, random.randint(-200, -50))
Handle CAPTCHA Challenges
When you encounter CAPTCHAs, you have options:
- Rotate to a different proxy/profile—often the simplest solution
- Use CAPTCHA solving services—2Captcha, Anti-Captcha integrate via APIs
- Implement exponential backoff—wait longer before retrying
def handle_captcha(page, profile_id, rotator):
    """Basic CAPTCHA handling strategy."""

    captcha_selectors = [
        "#captcha",
        ".g-recaptcha",
        "[data-sitekey]",
        "iframe[src*='captcha']"
    ]

    for selector in captcha_selectors:
        if page.locator(selector).count() > 0:
            print("CAPTCHA detected, rotating profile...")

            # Close current browser
            requests.post(
                f"{API_BASE}/browser/close",
                json={"id": profile_id}
            )

            # Get a fresh profile
            new_profile = rotator.get_next_profile()
            return new_profile["id"]

    return profile_id  # No CAPTCHA found
Step 7: Batch Import Proxies for Scale
Manually adding proxies doesn't scale.
BitBrowser supports batch import through the Proxy Management section.
Prepare Your Proxy List
Create a text file with one proxy per line:
ip1.example.com:8080:username1:password1
ip2.example.com:8080:username2:password2
ip3.example.com:8080:username3:password3
Import via BitBrowser UI
- Navigate to Proxy IP in the left sidebar
- Click Proxy Management
- Click Batch Add
- Paste your proxy list
- Click Import
Import via API
For programmatic imports:
def batch_create_profiles(proxy_list):
    """Create multiple profiles from a list of proxies."""

    profile_ids = []

    for i, proxy_string in enumerate(proxy_list):
        parts = proxy_string.strip().split(":")

        if len(parts) == 4:
            host, port, username, password = parts
        elif len(parts) == 2:
            host, port = parts
            username, password = "", ""
        else:
            continue

        proxy_config = {
            "type": "http",
            "host": host,
            "port": int(port),
            "username": username,
            "password": password
        }

        try:
            profile_id = create_profile(f"batch-{i}", proxy_config)
            profile_ids.append(profile_id)
            print(f"Created profile {i+1}: {profile_id}")
        except Exception as e:
            print(f"Failed to create profile {i+1}: {e}")

    return profile_ids

# Load proxies from file
with open("proxies.txt", "r") as f:
    proxies = f.readlines()

profiles = batch_create_profiles(proxies)
print(f"Created {len(profiles)} profiles")
This script reads a proxy list file and creates BitBrowser profiles for each one.
Alternative: Using Selenium Instead of Playwright
Some projects require Selenium for compatibility reasons.
BitBrowser works with Selenium too.
from selenium import webdriver
from selenium.webdriver.chrome.options import Options
from selenium.webdriver.chrome.service import Service
import requests

def scrape_with_selenium(profile_id, target_url):
    """Scrape using Selenium connected to BitBrowser."""

    # Open the browser profile
    open_response = requests.post(
        f"{API_BASE}/browser/open",
        json={"id": profile_id},
        headers={"Content-Type": "application/json"}
    )

    browser_data = open_response.json()["data"]
    debug_port = browser_data.get("http", "").split(":")[-1]
    driver_path = browser_data.get("driver")

    # Configure Selenium
    options = Options()
    options.add_experimental_option("debuggerAddress", f"127.0.0.1:{debug_port}")

    # Create driver with BitBrowser's chromedriver
    service = Service(executable_path=driver_path)
    driver = webdriver.Chrome(service=service, options=options)

    try:
        driver.get(target_url)

        # Your Selenium scraping logic
        title = driver.title
        page_source = driver.page_source

        return {"title": title, "content": page_source[:1000]}

    finally:
        driver.quit()

        # Close the BitBrowser profile
        requests.post(
            f"{API_BASE}/browser/close",
            json={"id": profile_id}
        )
The key difference: Selenium uses the debug port and webdriver path, while Playwright uses the WebSocket endpoint.
Common Errors and Solutions
"Browser profile not found"
Cause: The profile ID doesn't exist or was deleted.
Fix: List existing profiles first:
response = requests.post(
    f"{API_BASE}/browser/list",
    json={"page": 0, "pageSize": 100}
)
profiles = response.json()["data"]["list"]
print([p["name"] for p in profiles])
"Proxy connection failed"
Cause: Invalid proxy credentials or server is down.
Fix: Test proxies before creating profiles:
import socket

def test_proxy(host, port, timeout=5):
    """Test if a proxy is reachable."""
    try:
        sock = socket.socket(socket.AF_INET, socket.SOCK_STREAM)
        sock.settimeout(timeout)
        result = sock.connect_ex((host, int(port)))
        sock.close()
        return result == 0
    except:
        return False

# Test before creating profile
if test_proxy("proxy.example.com", 8080):
    profile_id = create_profile("tested-profile", proxy_config)
else:
    print("Proxy unreachable")
"WebSocket connection refused"
Cause: BitBrowser isn't running or Local API is disabled.
Fix:
- Ensure BitBrowser is running
- Check Settings > Local API is enabled
- Verify the port isn't blocked by firewall
"Page timeout during scrape"
Cause: The page loads slowly or is blocked.
Fix: Increase timeout and add retry logic:
def scrape_with_retry(page, url, max_retries=3):
    """Attempt to load a page with retries."""

    for attempt in range(max_retries):
        try:
            page.goto(url, timeout=60000, wait_until="domcontentloaded")
            return True
        except Exception as e:
            print(f"Attempt {attempt + 1} failed: {e}")
            time.sleep(2 ** attempt)  # Exponential backoff

    return False
Best Practices for Production Scraping
1. Monitor Proxy Health
Track which proxies fail and remove bad ones:
class ProxyHealthTracker:
    def __init__(self):
        self.stats = {}

    def record_success(self, proxy_host):
        if proxy_host not in self.stats:
            self.stats[proxy_host] = {"success": 0, "fail": 0}
        self.stats[proxy_host]["success"] += 1

    def record_failure(self, proxy_host):
        if proxy_host not in self.stats:
            self.stats[proxy_host] = {"success": 0, "fail": 0}
        self.stats[proxy_host]["fail"] += 1

    def get_healthy_proxies(self, min_success_rate=0.7):
        healthy = []
        for host, stats in self.stats.items():
            total = stats["success"] + stats["fail"]
            if total > 0:
                rate = stats["success"] / total
                if rate >= min_success_rate:
                    healthy.append(host)
        return healthy
2. Respect Rate Limits
Even with proxies, hammering a site will get you blocked:
# Good: Gradual scraping
for url in urls:
    scrape(url)
    time.sleep(random.uniform(3, 8))

# Bad: Rapid fire
for url in urls:
    scrape(url)  # No delay
3. Use Residential Proxies for Sensitive Sites
Datacenter IPs are easy to detect.
Residential proxies appear as real home internet connections.
They cost more but have much higher success rates on protected sites.
4. Rotate User Agents
Even with fingerprint protection, vary your user agents:
BitBrowser handles this per-profile, but verify in the Fingerprint settings.
5. Store Session Data
Save cookies and local storage between sessions:
def save_session(profile_id, page):
    """Save cookies for a profile."""
    cookies = page.context.cookies()
    with open(f"cookies_{profile_id}.json", "w") as f:
        json.dump(cookies, f)

def load_session(profile_id, page):
    """Load saved cookies into a profile."""
    try:
        with open(f"cookies_{profile_id}.json", "r") as f:
            cookies = json.load(f)
        page.context.add_cookies(cookies)
    except FileNotFoundError:
        pass
Conclusion
Combining BitBrowser with proper proxy rotation creates a robust scraping setup.
The key components:
- BitBrowser profiles provide isolated fingerprints and environments
- Local API enables programmatic control via Python or Node.js
- Playwright/Puppeteer connect via CDP for powerful automation
- Proxy rotation distributes requests across multiple IPs
- Human-like behavior simulation avoids bot detection
Start with a few profiles and proxies.
Scale up as you understand your target site's defenses.


