Managing multiple proxies used to mean endless trips to browser settings. Proxy SwitchOmega kills that workflow entirely—letting you switch between unlimited proxy profiles from your toolbar with a single click.
This guide covers everything from basic installation to advanced PAC scripts, anti-detection techniques, and automation tricks that most tutorials skip entirely.
What is Proxy SwitchOmega?
Proxy SwitchOmega is a browser extension that transforms proxy management from a manual chore into a few clicks. Instead of navigating browser settings every time you need a different IP, you create profiles and switch between them instantly from your toolbar.
The extension handles HTTP, HTTPS, SOCKS4, and SOCKS5 proxies. You can create auto-switching rules based on URL patterns, write custom PAC scripts for dynamic proxy selection, and chain multiple proxies together.
Think of it as a command center for all your proxy traffic.
Why This Matters in 2026
The original SwitchyOmega extension was removed from the Chrome Web Store in 2024 because it didn't support Manifest V3—Chrome's new extension security standard. You now need ZeroOmega, an actively maintained fork that works perfectly with modern browsers.
Firefox users can still use the original extension, but ZeroOmega provides consistency across all browsers and includes extra features like Gist sync and dark mode.
Step 1: Install ZeroOmega (The Manifest V3 Fix)
The installation process differs by browser. Here's how to get set up properly.
For Chrome, Edge, and Brave
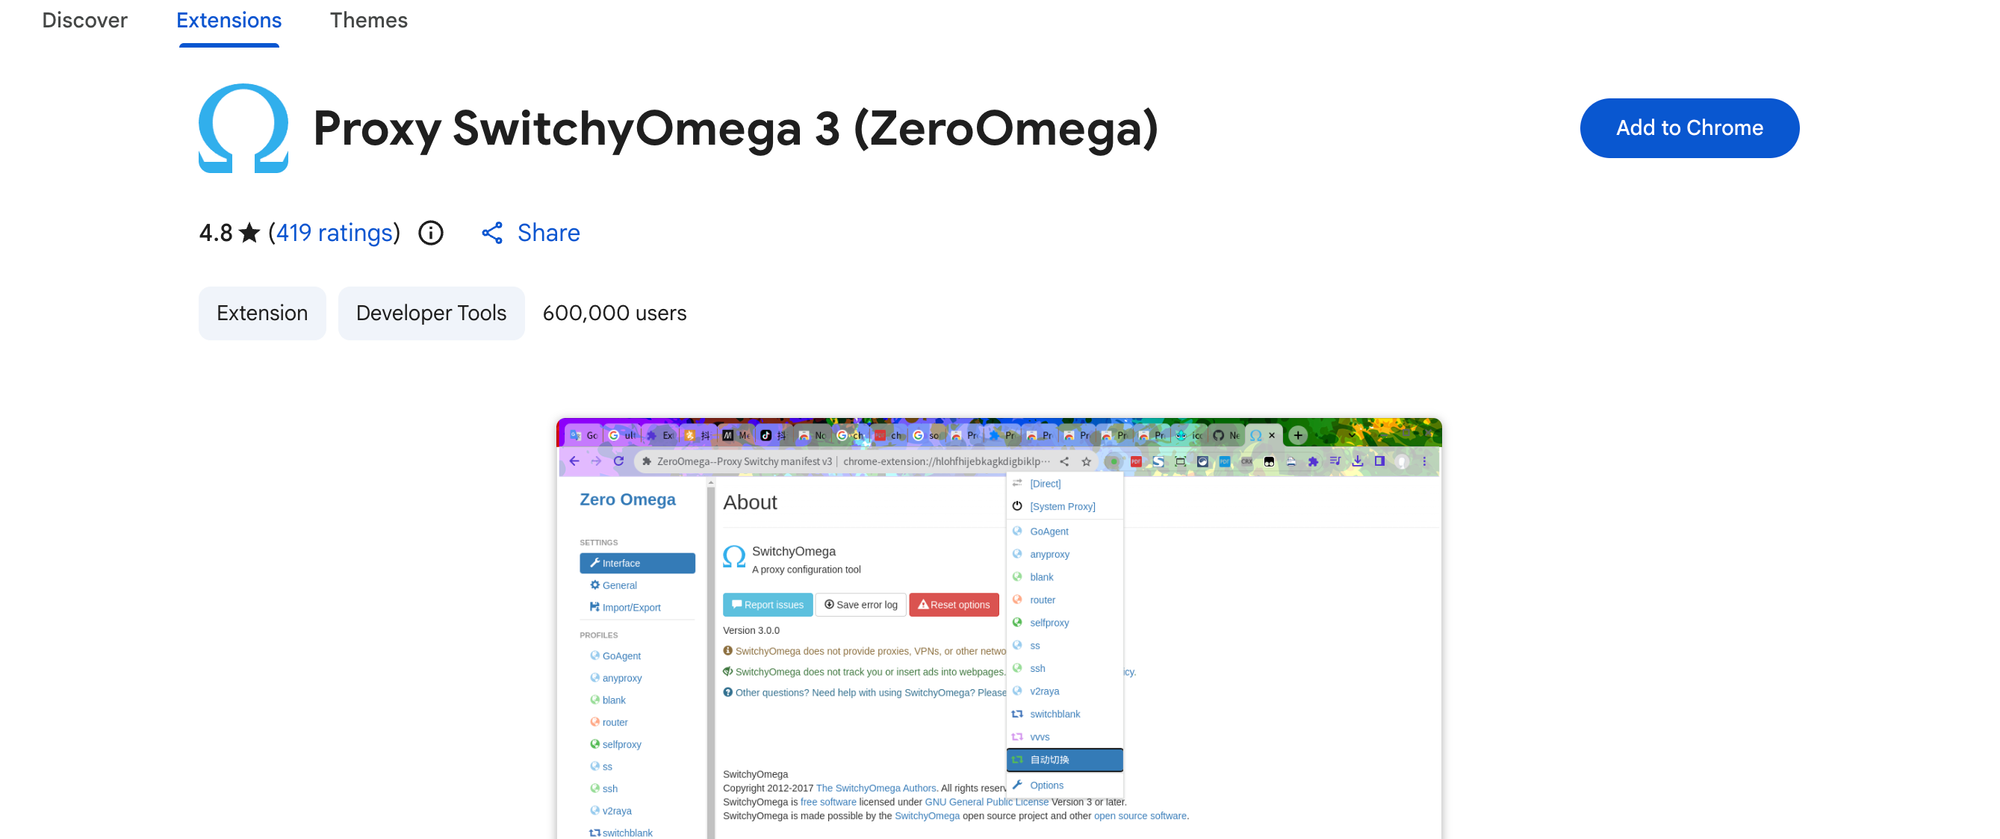
Navigate to the Chrome Web Store and search for "Proxy SwitchyOmega 3 (ZeroOmega)" or use this direct link.
Click "Add to Chrome" and grant the requested permissions. The extension needs access to manage your proxy settings—this is expected behavior, not a security risk.
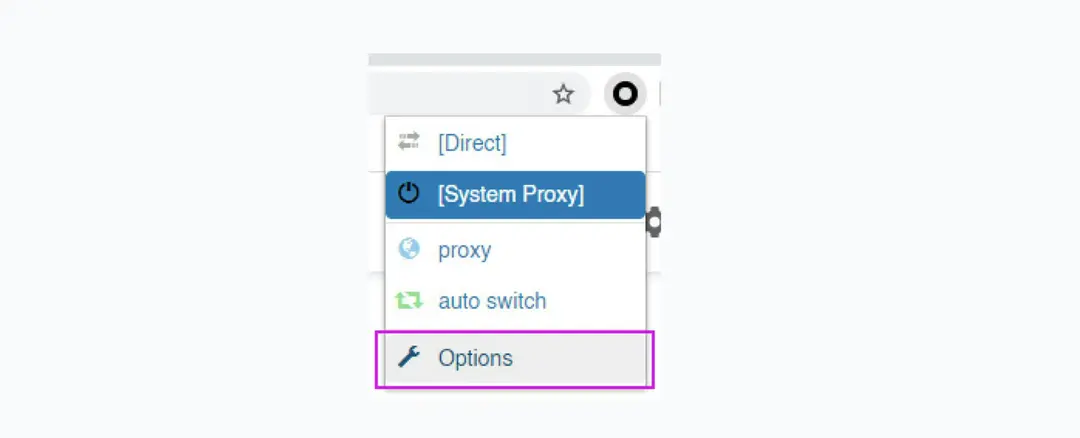
After installation, click the puzzle piece icon in your toolbar and pin ZeroOmega for quick access. Click the icon, then select "Options" to open the configuration dashboard.
For Firefox
Firefox still supports the original SwitchyOmega extension through Mozilla Add-ons. However, I recommend installing ZeroOmega from Firefox Add-ons for consistency with Chrome setups and access to newer features.
The icon auto-pins to your Firefox toolbar after installation.
Manual Installation (If Store Access is Blocked)
Some corporate networks or regions block extension stores. Here's the manual installation method:
# Clone the ZeroOmega repository
git clone https://github.com/zero-peak/ZeroOmega.git

# Navigate to the build directory
cd ZeroOmega/omega-build

# Install dependencies
npm run deps

# Build the extension
npm run build
This generates the unpacked extension in the omega-chromium-extension/build/ directory.
To load it in Chrome, go to chrome://extensions/, enable "Developer mode" in the top-right corner, click "Load unpacked," and select the build folder.
The extension should now appear in your toolbar.
Step 2: Create Your First Proxy Profile
With ZeroOmega installed, let's configure your first proxy.
Creating a New Profile
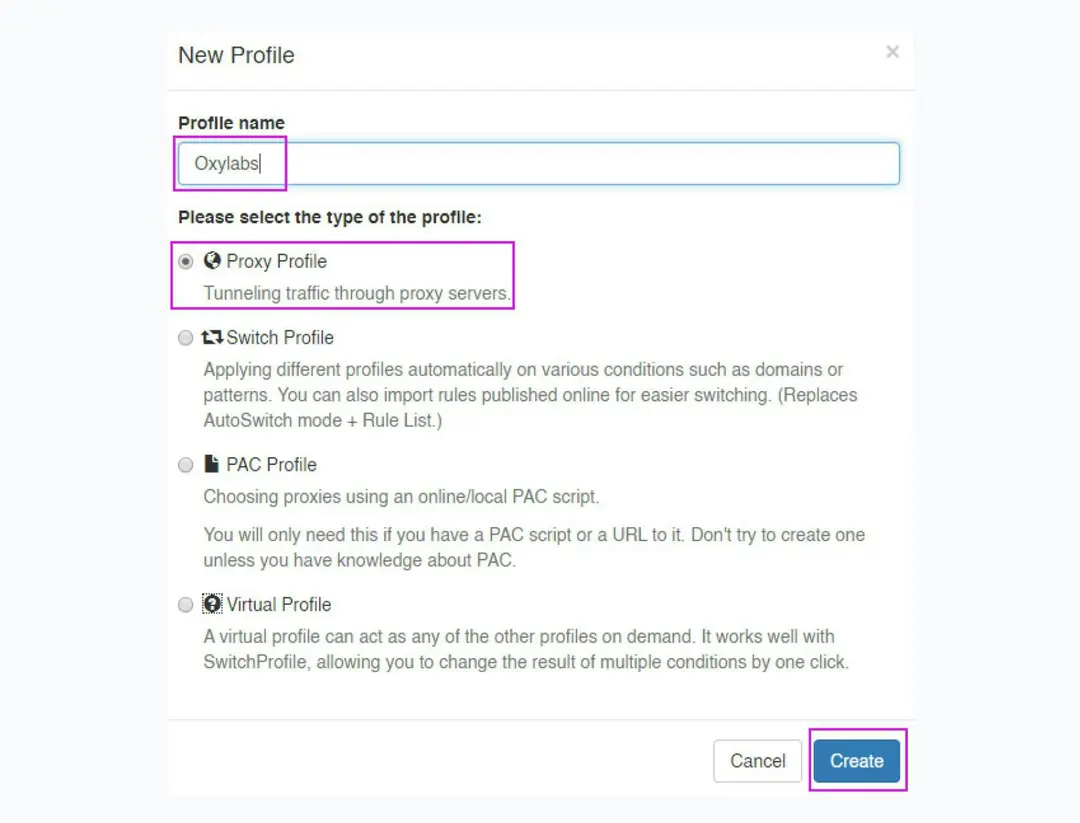
Click the ZeroOmega icon and select "Options" to open the dashboard. On the left sidebar, click "New Profile."

Enter a descriptive name—something like "US Residential" or "Scraping Proxy" works well.
Under "Profile type," select "Proxy Profile" and click "Create."
Entering Proxy Details
Your new profile opens with empty configuration fields. Here's what each one means:
Protocol determines how your browser communicates with the proxy server. Your options are:
- HTTP: Works for most web browsing. Fastest option.
- HTTPS: Same as HTTP but with encrypted connection to the proxy.
- SOCKS4: Supports TCP connections only. No authentication.
- SOCKS5: Supports both TCP and UDP. Allows username/password authentication.
Server is the proxy IP address or hostname. Examples: 45.123.67.89 or us-proxy.example.com.
Port is the proxy port number. Common ports include 8080, 3128, 1080, and custom ports from your proxy provider.
Setting Up Authentication
If your proxy requires username and password, click the lock icon next to the port field. A popup appears where you enter your credentials.
Important: For proxies with special characters in credentials, use URL encoding:
@becomes%40#becomes%23:becomes%3A
Example: If your username is user@email.com and password is pass#word, enter them as user%40email.com and pass%23word.
Saving and Activating
Click "Apply changes" on the left sidebar to save your configuration.
To activate the proxy, click the ZeroOmega icon in your toolbar and select your new profile from the dropdown. All browser traffic now routes through this proxy.
Verifying Your Setup
Open a new tab and visit whatismyipaddress.com to confirm your IP has changed.
For a quick programmatic check, open your browser's developer console (F12) and run:
fetch('https://api.ipify.org?format=json')
  .then(response => response.json())
  .then(data => console.log('Current IP:', data.ip));
The output should show your proxy's IP address, not your real one.
Step 3: Configure Advanced Auto-Switching Rules
Basic proxy profiles get the job done, but auto-switching is where SwitchOmega shows its real power. You can route specific sites through specific proxies automatically.
Creating a Switch Profile
From the Options dashboard, click "New Profile." Name it something like "Auto Router" and select "Switch Profile" as the type. Click "Create."
The Switch Profile interface shows a rule table. Each row defines a condition and a corresponding action (which proxy profile to use).
Rule Syntax Explained
Rules use pattern matching to identify URLs. Here are the pattern types:
Host Wildcard matches domain names only:
*.netflix.com        → US Proxy
*.bbc.co.uk          → UK Proxy
192.168.*            → DIRECT
localhost            → DIRECT
URL Wildcard matches entire URLs including paths:
*://api.example.com/*    → API Proxy
*://cdn.example.com/*    → DIRECT
URL Regex for complex patterns:
/.*\\.google\\.(com|co\\.uk|de)/ → Search Proxy
Building a Practical Auto-Switch Configuration
Here's a real-world setup for someone managing web scraping, streaming, and local development:
| Condition Type | Pattern | Proxy Profile |
|---|---|---|
| Host wildcard | localhost | DIRECT |
| Host wildcard | 127.0.0.1 | DIRECT |
| Host wildcard | 192.168.* | DIRECT |
| Host wildcard | 10.* | DIRECT |
| Host wildcard | *.local | DIRECT |
| Host wildcard | *.netflix.com | US Residential |
| Host wildcard | *.bbc.co.uk | UK Proxy |
| Host wildcard | *.target-site.com | Rotating Proxy |
| (Default) | * | Public Proxy |
Rule Priority Matters
Rules process top-to-bottom. The first matching rule wins. Put your most specific rules at the top and your catch-all default at the bottom.
Bad ordering:
*               → Default Proxy
*.company.com   → Corporate Proxy  (never reached!)
Good ordering:
api.internal.company.com   → DIRECT
*.company.com              → Corporate Proxy
*                          → Default Proxy
Using Condition Types Effectively
Host Wildcard is 10x faster than URL Wildcard for pattern matching. Use it whenever you're matching domains only—not URL paths.
Slow:
https://*.example.com/*
Fast:
*.example.com
Both match example.com subdomains, but the host wildcard processes requests faster.
Step 4: Master PAC Scripts for Dynamic Routing
PAC (Proxy Auto-Config) scripts let you write JavaScript that executes on every request to determine which proxy to use. This unlocks routing logic that rule-based profiles can't achieve.
Basic PAC Script Structure
Every PAC script implements a function called FindProxyForURL. The browser calls this function for each request, passing the full URL and the host portion.
function FindProxyForURL(url, host) {
    // Return "DIRECT" for no proxy
    // Return "PROXY host:port" for HTTP proxy
    // Return "SOCKS5 host:port" for SOCKS5 proxy

    return "DIRECT";
}
Creating a PAC Profile
In ZeroOmega, click "New Profile," enter a name, select "PAC Profile," and click "Create."
You'll see a text area for your script. Paste your PAC code here and click "Apply changes."
Practical PAC Script Examples
Route local addresses directly, specific domains through proxies:
function FindProxyForURL(url, host) {
    // Direct connection for local addresses
    if (isInNet(host, "192.168.0.0", "255.255.0.0") ||
        isInNet(host, "10.0.0.0", "255.0.0.0") ||
        host === "localhost" ||
        host === "127.0.0.1") {
        return "DIRECT";
    }

    // US proxy for streaming services
    if (dnsDomainIs(host, ".netflix.com") ||
        dnsDomainIs(host, ".hulu.com") ||
        dnsDomainIs(host, ".disneyplus.com")) {
        return "SOCKS5 us-proxy.example.com:1080";
    }

    // UK proxy for BBC
    if (dnsDomainIs(host, ".bbc.co.uk") ||
        dnsDomainIs(host, ".bbc.com")) {
        return "PROXY uk-proxy.example.com:8080";
    }

    // Default proxy for everything else
    return "PROXY default-proxy.example.com:8080";
}
The dnsDomainIs() function checks if the host matches a domain suffix. The isInNet() function checks if an IP falls within a range.
Rotate proxies based on time:
function FindProxyForURL(url, host) {
    // Skip local addresses
    if (isPlainHostName(host) ||
        isInNet(host, "192.168.0.0", "255.255.0.0")) {
        return "DIRECT";
    }

    // Rotate through proxy list based on current minute
    var proxies = [
        "PROXY proxy1.example.com:8080",
        "PROXY proxy2.example.com:8080",
        "PROXY proxy3.example.com:8080",
        "PROXY proxy4.example.com:8080"
    ];

    var minute = new Date().getMinutes();
    var index = minute % proxies.length;

    return proxies[index];
}
This rotates proxies every minute. Each proxy handles ~15 minutes per hour.
Route by URL path for API-specific proxies:
function FindProxyForURL(url, host) {
    // Use API proxy for all API endpoints
    if (shExpMatch(url, "*/api/*") ||
        shExpMatch(url, "*/v1/*") ||
        shExpMatch(url, "*/v2/*")) {
        return "SOCKS5 api-proxy.example.com:1080";
    }

    // Use fast proxy for static content
    if (shExpMatch(url, "*.jpg") ||
        shExpMatch(url, "*.png") ||
        shExpMatch(url, "*.css") ||
        shExpMatch(url, "*.js")) {
        return "DIRECT";
    }

    return "PROXY default.example.com:8080";
}
The shExpMatch() function performs shell-expression matching against URLs.
PAC Script Limitations in Chrome
Chrome introduced a privacy feature that stops passing full HTTPS URLs to PAC scripts. You only receive the host portion for HTTPS requests.
This means URL-path-based rules won't work for HTTPS traffic. Workaround: use host-based rules or Switch Profiles with host wildcards for HTTPS sites.
Loading External PAC Files
Instead of writing PAC scripts inline, you can load them from a URL:
- Create a PAC Profile in ZeroOmega
- Enter your PAC file URL:
http://your-server.com/proxy.pac - Click "Update now" to fetch the script
The browser fetches and caches the PAC file. ZeroOmega won't automatically refresh it—click "Update now" when you modify the remote file.
Step 5: Prevent Detection with WebRTC and DNS Leak Protection
Using proxies without leak protection is like locking your front door but leaving windows open. Modern websites use multiple techniques to detect your real IP.
Understanding WebRTC Leaks
WebRTC (Web Real-Time Communication) enables peer-to-peer connections for video calls and file sharing. The problem: WebRTC makes STUN server requests that bypass your proxy entirely, exposing your real IP address.
Even with a proxy active in SwitchOmega, visiting a site that runs WebRTC code can reveal your true location.
Fixing WebRTC Leaks in Chrome
Chrome doesn't have a built-in toggle to disable WebRTC. You need an extension.
Install "WebRTC Leak Prevent" from the Chrome Web Store. After installation:
- Right-click the extension icon and select "Options"
- Set "IP handling policy" to "Disable non-proxied UDP (force proxy)"
- Click "Apply settings"
This forces all WebRTC traffic through your proxy, blocking most leaks.
Testing for leaks: Visit browserleaks.com/webrtc. With protection enabled, your real IP should not appear in the results.
Fixing WebRTC Leaks in Firefox
Firefox provides a native setting. Type about:config in the address bar and accept the warning.
Search for media.peerconnection.enabled and double-click to set it to false.
This completely disables WebRTC. Video calls and some real-time features will stop working, but your IP stays hidden.
DNS Leak Protection
DNS leaks occur when your browser sends DNS queries directly to your ISP instead of routing them through the proxy.
For SOCKS5 proxies: Chrome automatically sends DNS requests through SOCKS5 proxies—no extra configuration needed.
For HTTP proxies: DNS requests bypass the proxy by default. Fix this by enabling DNS over HTTPS:
- Open Chrome settings
- Go to Privacy and Security → Security
- Enable "Use secure DNS"
- Select a provider like Cloudflare (1.1.1.1) or Google (8.8.8.8)
For extra protection, launch Chrome with DNS resolver rules:
chrome --host-resolver-rules="MAP * ~NOTFOUND , EXCLUDE 127.0.0.1"
This blocks all DNS queries except those to localhost, forcing Chrome to use the proxy's DNS resolution.
Preventing DNS Prefetching Leaks
Chrome's DNS prefetching can leak DNS requests before you even visit a page. Disable it:
- Go to Chrome Settings → Privacy and Security
- Disable "Preload pages for faster browsing and searching"
ZeroOmega typically disables this automatically, but verify the setting is off.
Browser Fingerprint Consistency
Your proxy IP might show a US location, but if your browser reports a European timezone and German language, detection systems flag the mismatch.
For serious anonymity, use a script via Tampermonkey to spoof browser properties:
// ==UserScript==
// @name         Fingerprint Spoof
// @match        *://*/*
// @run-at       document-start
// ==/UserScript==

// Spoof timezone
Date.prototype.getTimezoneOffset = function() {
    return 300; // EST (UTC-5)
};

// Spoof language
Object.defineProperty(navigator, 'language', {
    get: function() { return 'en-US'; }
});

Object.defineProperty(navigator, 'languages', {
    get: function() { return ['en-US', 'en']; }
});
Match these values to your proxy's geographic location for best results.
Step 6: Use Proxies in Headless Browser Automation
SwitchOmega is perfect for manual browsing, but what about automated scraping with Selenium or Puppeteer?
Browser extensions don't load in headless mode by default. Here's how to handle proxy configuration for automation.
Selenium with Python
For basic HTTP proxies without authentication:
from selenium import webdriver
from selenium.webdriver.chrome.options import Options

chrome_options = Options()

# Set proxy directly via Chrome arguments
chrome_options.add_argument('--proxy-server=http://proxy.example.com:8080')

driver = webdriver.Chrome(options=chrome_options)
driver.get('https://whatismyip.com')

print(driver.title)
driver.quit()
For SOCKS5 proxies:
chrome_options.add_argument('--proxy-server=socks5://127.0.0.1:9050')
Handling Authenticated Proxies in Selenium
Chrome doesn't support proxy authentication via command line arguments. You need a helper extension or the selenium-wire library:
from seleniumwire import webdriver

options = {
    'proxy': {
        'http': 'http://username:password@proxy.example.com:8080',
        'https': 'https://username:password@proxy.example.com:8080',
    }
}

driver = webdriver.Chrome(seleniumwire_options=options)
driver.get('https://whatismyip.com')
driver.quit()
Install selenium-wire with: pip install selenium-wire
Puppeteer with Node.js
Puppeteer handles proxies elegantly:
const puppeteer = require('puppeteer');

(async () => {
    const browser = await puppeteer.launch({
        args: ['--proxy-server=http://proxy.example.com:8080']
    });

    const page = await browser.newPage();

    // Authenticate if required
    await page.authenticate({
        username: 'your-username',
        password: 'your-password'
    });

    await page.goto('https://whatismyip.com');
    console.log(await page.title());

    await browser.close();
})();
Playwright with Python
Playwright provides first-class proxy support:
from playwright.sync_api import sync_playwright

with sync_playwright() as p:
    browser = p.chromium.launch(
        proxy={
            'server': 'http://proxy.example.com:8080',
            'username': 'your-username',
            'password': 'your-password'
        }
    )

    page = browser.new_page()
    page.goto('https://whatismyip.com')
    print(page.title())

    browser.close()
Loading SwitchOmega Config in Selenium (Advanced)
If you need SwitchOmega-specific features in automation, you can load the extension:
from selenium import webdriver
from selenium.webdriver.chrome.options import Options
import os

chrome_options = Options()

# Path to your ZeroOmega extension folder
extension_path = '/path/to/zeroomega/extension'
chrome_options.add_argument(f'--load-extension={extension_path}')

# Disable headless mode (extensions require headed)
chrome_options.add_argument('--start-maximized')

driver = webdriver.Chrome(options=chrome_options)

# Give extension time to load
import time
time.sleep(2)

driver.get('https://example.com')
Extensions don't work in headless mode. For headless scraping, use the direct proxy arguments shown earlier.
Troubleshooting Common Issues
"Proxy Not Switching" After Sleep/Hibernate
ZeroOmega sometimes loses proxy state after your computer wakes from sleep. Quick fixes:
- Click the ZeroOmega icon and reselect your profile
- Add this rule to your Auto Switch profile to force reconnection:
// First rule in Auto Switch
if (url.indexOf('http') === 0) {
    return previousProxy + "; DIRECT";
}
- Restart your browser if the issue persists
Authentication Popup Loops
If you keep getting prompted for credentials:
- Verify your username and password are correct
- Check if your proxy requires IP whitelisting (add your IP in your proxy provider's dashboard)
- Use URL-encoded credentials for special characters:
user@email.combecomesuser%40email.compass#wordbecomespass%23word
PAC Script Not Working with HTTPS
Chrome's privacy feature prevents PAC scripts from seeing full HTTPS URLs. You only get the hostname.
Workaround: Use host-based rules in a Switch Profile instead of URL-based PAC logic for HTTPS traffic.
Extension Conflicts
SwitchOmega conflicts with other proxy extensions. Check extension priority:
- Go to
chrome://extensions/ - Click "Details" on ZeroOmega
- Ensure no other proxy extensions are enabled
If another extension must coexist, uninstall and reinstall ZeroOmega to reset its priority in Chrome's extension loading order.
Slow Proxy Connection
If pages load slowly through your proxy:
- Test your proxy's latency:
ping proxy-ip-address - Try a different proxy server (geographic proximity matters)
- Check your proxy provider's dashboard for bandwidth limits
- Ensure your bypass list includes local resources:
127.0.0.1
localhost
192.168.*
10.*
*.local
Proxy Works in Browser but Not in Applications
SwitchOmega only affects browser traffic. System-wide proxy configuration is separate.
On Windows, set system proxy through Settings → Network & Internet → Proxy.
On macOS, set system proxy through System Preferences → Network → Advanced → Proxies.
Hidden Tricks and Pro Tips
Keyboard Shortcuts for Fast Switching
Set up hotkeys to switch profiles without touching your mouse:
- Go to
chrome://extensions/shortcuts - Find ZeroOmega in the list
- Assign keyboard shortcuts to your most-used profiles
I use Ctrl+Shift+1 for "Direct" and Ctrl+Shift+2 for my primary proxy.
Gist Sync for Cross-Device Configuration
ZeroOmega supports syncing your configuration via GitHub Gists:
- Create a GitHub account if you don't have one
- Generate a Personal Access Token with
gistscope - In ZeroOmega Options, go to Import/Export
- Enable Gist sync and paste your token
Your profiles now sync automatically across all browsers using the same token.
Profile Backup Before Major Changes
Before modifying complex configurations, export a backup:
- Go to Options → Import/Export
- Click "Export to file"
- Save the
.bakfile
Restore anytime by clicking "Restore from file" and selecting your backup.
Bypass List Optimization
Add these to your bypass list in every proxy profile for faster local development:
127.0.0.1
localhost
*.localhost
192.168.*
10.*
172.16.*
*.local
*.test
*.internal
Custom Icons for Quick Visual Identification
ZeroOmega lets you set custom colors for profiles. Use this to create visual categories:
- Green: Direct/no proxy
- Blue: Work proxies
- Red: Sensitive/high-anonymity proxies
- Yellow: Rotating/scraping proxies
Testing Proxy Chains
To test if traffic flows through your proxy:
# On Linux/macOS, use curl with explicit proxy
curl -x http://proxy.example.com:8080 https://api.ipify.org

# For SOCKS5
curl --socks5 127.0.0.1:9050 https://api.ipify.org
The returned IP should match your proxy's exit IP.
FAQ
Does SwitchOmega work with VPNs?
Yes, but understand the traffic flow. With a VPN active:
- Browser traffic → SwitchOmega proxy → VPN tunnel → VPN server → Internet
The proxy sees your VPN IP, not your real IP. Websites see the proxy IP, not the VPN IP.
Can I use multiple proxies simultaneously?
Not for the same request. However, you can route different sites through different proxies using Auto Switch profiles. Each domain hits one proxy at a time.
Why is my real IP still leaking?
Check these in order:
- WebRTC leak: Install WebRTC Leak Prevent
- DNS leak: Enable DNS over HTTPS
- Browser extensions: Some extensions make direct connections
- IPv6 leak: Disable IPv6 if your proxy only supports IPv4
Is SwitchOmega safe to use?
ZeroOmega is open-source with code available on GitHub. It doesn't collect or transmit your data. The extension only needs proxy-related permissions to function.
However, the proxy servers you connect to can see your traffic. Use trusted proxy providers and HTTPS websites.
What's the difference between HTTP and SOCKS5 proxies?
HTTP proxies understand HTTP protocol. They can cache, filter, and modify HTTP traffic. Faster for web browsing but limited to HTTP/HTTPS.
SOCKS5 proxies operate at a lower level. They forward any TCP/UDP traffic without understanding the protocol. More versatile but slightly slower.
For web scraping and general browsing, HTTP proxies work fine. For applications needing non-HTTP protocols, use SOCKS5.
Does ZeroOmega affect incognito mode?
By default, extensions don't run in incognito. To enable ZeroOmega in incognito:
- Go to
chrome://extensions/ - Click "Details" on ZeroOmega
- Enable "Allow in incognito"
Remember: Incognito mode doesn't hide your IP. You still need a proxy for anonymity.
Final Thoughts
Proxy SwitchOmega (via ZeroOmega) remains the best tool for managing browser proxies in 2026. It handles everything from basic proxy switching to complex PAC-based routing without bloating your browser or spying on your traffic.
The key to success isn't just the extension—it's the combination of:
- Properly configured proxy profiles
- WebRTC and DNS leak protection
- Browser fingerprint consistency
- Quality proxy servers
The extension is just a traffic manager. Your actual success depends on the proxies you connect to. Bad proxies get blocked regardless of how sophisticated your SwitchOmega setup is.
For web scraping and data collection, pair SwitchOmega with residential proxies that rotate IPs. For streaming geo-restricted content, use static residential IPs from the target region. For general privacy, datacenter proxies offer the best price-to-performance ratio.
Now go build a proxy setup that actually works.